Preparation of Yanae
1.A. Opening the packaging
Please note: Preparation should be performed on a flat surface. Open half of the packaging on the side marked “open” to access the inflation tube and preserve the sterility of the IUD.
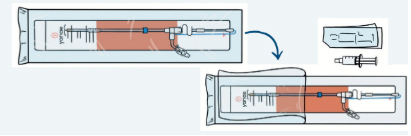
1.B. Inflating the membrane
Remove the pre-filled saline syringe from its packaging. No need to remove the air from the syringe. Turn the inflation tube upwards into a vertical position.

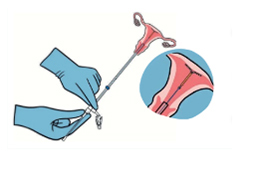
Connect the pre-filled syringe to the luer port
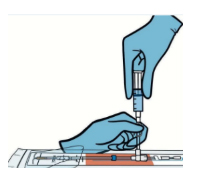
Inject the content until you feel a strong resistance. It is not necessary to inject all the saline solution. While holding the plunger firmly down, clamp to secure the pressure.
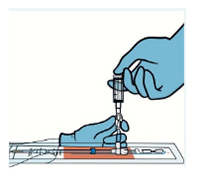
Remove the syringe and check that the inflation tube is well distended.
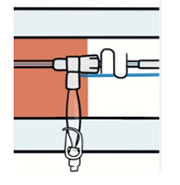
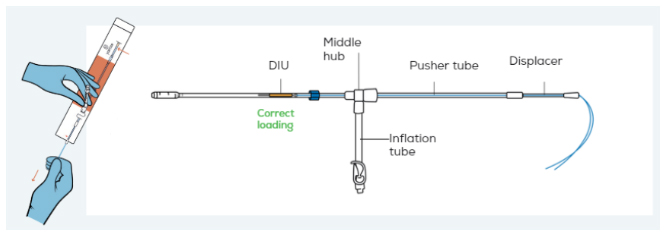
1.C. Loading the IUD into the inserter
To load the IUD into the inserter, hold the device flat by the middle hub with your non-dominant hand and then release the blue threads from the packaging with your other hand.
Pull back the blue threads to fold the arms of the IUD into the inserter and slide it into the tube.
Pull all the way through until you can not pull anymore and then verify that the IUD is entirely in the inserter with the copper part of the IUD close to the blue flange (approx 1 cm). Remove the IUD from its packaging.
Insertion of Yanae
2.A. Deploying the membrane into the uterine cavity
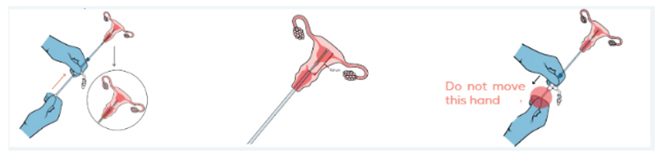
To initiate the deployment of the membrane, it is important to insert the external part of the membrane, i.e. the few millimeters of the distal part of the device, into the external orifice of the cervix.
Note: The rigid graduated outer tube remains outside and comes into contact with the external cervix.
While holding the middle hub with your non-dominant hand, gently push the pusher tube to deploy the flexible membrane through the cervical canal and advance the IUD into the uterine cavity until the end of the pusher tube is in contact with the middle hub. The membrane measures 6.8 cm.
For small uterus (length < 7cm), the end of the membrane will be in contact with the uterine fundus before the end of the push. When you feel resistance, stop pushing. While holding the pusher tube in a fixed position, bring the middle hub back towards the pusher tube.
At the end of this step, the end of the pusher tube should be in contact with the middle hub of the inserter.
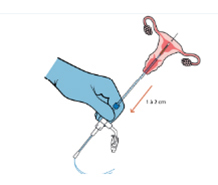
2.B. Deployment of the IUD and withdrawal of the inserter
Pull back the entire inserter by 1 to 2 cm to leave enough space in the uterine cavity for the deployment of the arms of the IUD.
While holding the middle hub in a fixed position, push the displacer to deploy the IUD into the uterine cavity. At the end of this stage, the displacer knob should abut against the knob of the pusher tube. In case you reach the fundus before the end of the deployment of the IUD, adjust the deployment by pulling back the middle hub while maintaining the pusher knob in a fixed position. The IUD is now correctly placed at the fundus.
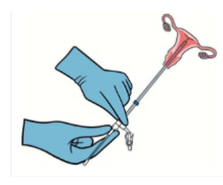
To ensure complete release of the IUD, all three elements (middle hub, end of the pusher tube and end of the displacer tube) must be in contact. You can remove the entire inserter by holding it by the middle hub, in one go.
Cut the threads so that they are visible outside the cervix (approx. 3-4 cm).

The information on this website is intended for Republic of Ireland residents only.
(IE-YAN-25) Date of preparation: February 2025